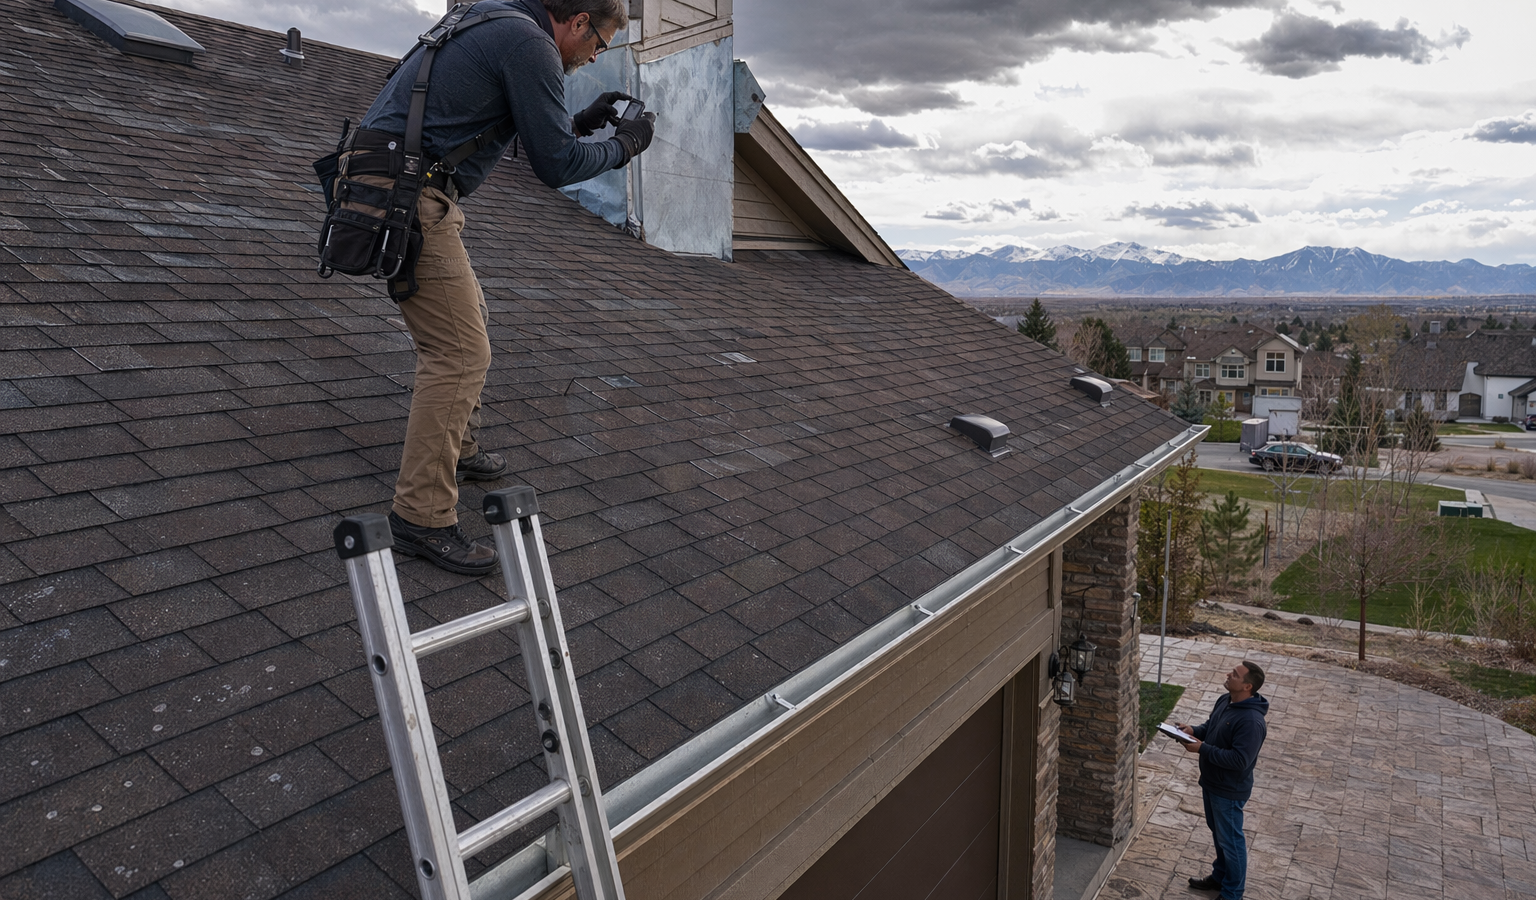
If you’ve wondered what really happens during a professional roof inspection, here’s a clear, step-by-step walkthrough from AC INC. Roofing (Advanced Consulting, Inc.). As a licensed and insured contractor based in Denver and serving the Front Range and Cheyenne, our HAAG-certified inspectors deliver free, thorough assessments tailored to Colorado’s hail, wind, and snow-load realities. We’re Colorado’s first company to achieve Master HAAG Certification, rated 5.0 stars on Google, and trusted by homeowners and property managers for precise documentation and practical recommendations.
Why inspections matter more in Colorado
Colorado’s Front Range sees intense UV exposure, rapid freeze–thaw cycles, high winds, and frequent hail. Those conditions accelerate wear and can turn small defects into leaks. Proactive inspections help you:
– Catch issues early before interior damage occurs
– Document storm events for potential insurance claims
– Plan maintenance and budgets with accurate, unbiased data
Who should perform your inspection
Look for proven credentials and strong warranties. AC INC. Roofing brings:
– Master HAAG Certification (storm-damage experts trained to differentiate normal wear from hail, wind, and mechanical damage)
– Atlas Pro+ Platinum and GAF Certified credentials (access to robust system warranties)
– Directorii certification (backed by up to a $20,000 customer guarantee)
– Memberships: RSRA, CRA, NRCA, APA (ethics, education, and consumer advocacy)
How to prepare for an appointment
- Clear driveway access for ladders and safe footing
- Unlock gates; secure pets
- If attic access is needed, clear the access hatch area
- Have your policy info handy if the visit follows a storm
Typical time on site: 60–90 minutes for most homes; larger or steep/complex or commercial roofs may take longer.
The step-by-step roof inspection process
1) Brief interview and safety setup
We start with a short conversation about roof age, known issues, and recent storms. Then we establish safe access, review fall protection needs, and protect landscaping where ladders will rest.
2) Ground-level and exterior perimeter check
- Photograph the property and elevations for context
- Scan siding, windows, soft metals, and gutters/downspouts for impacts or wind displacement
- Note grading and drainage patterns that may affect water management
3) Roof surface evaluation (steep-slope: shingles, metal, tile)
On the roof, your HAAG-certified inspector evaluates each plane and transition, documenting with photos and notes:
– Shingles: granule loss, bruising, creased or torn tabs, nail pops, thermal cracking, blistering, and manufacturer-specific patterns
– Impact evidence: dents in soft metals (vents, flashing) and matched spatter—key for hail verification
– Flashings and penetrations: chimneys, skylights, plumbing boots, satellite mounts, furnace/B-vent flashings
– Edge details: rake/eave metal, starter courses, drip edge condition
– Sealants: weathered or failed sealant at transitions
– Fasteners: backed-out nails/screws; under-driven or over-driven fasteners
– Ventilation components: intake/exhaust balance, baffles, blocked vents
– Ice dam risk factors: inadequate insulation/ventilation or heat loss points common in Front Range winters
If your roof uses premium materials—impact-resistant shingles, metal, or tile—we assess for material-specific issues like coating wear, fastener-backed seams, slipped/broken tiles, or impact dimples on metal panels.
4) Low-slope and commercial systems (TPO, EPDM, Modified Bitumen, coatings)
For flat and low-slope roofs, we check:
– Membrane condition: UV degradation, punctures, shrinkage, alligatoring
– Seams and terminations: weld quality, adhesive failures, fish-mouths, edge securement
– Flashings and penetrations: pitch pans, pipe boots, curbs, scuppers/drains
– Fasteners and plates: uplift concerns and moisture staining around fasteners
– Ponding water: layout, depth marks, and drainage pathways
– Existing fluid-applied coatings: thickness/coverage consistency and adhesion
5) Attic and interior assessment (when accessible)
- Decking: signs of deflection, rot, nail pull-through
- Moisture: staining, active leaks, mold/mildew indicators
- Insulation and ventilation: airflow balance, baffle placement, ice-dam contributors
- Bath and kitchen exhaust terminations: proper ducting to exterior
6) Measurements and documentation
Accurate documentation protects you and speeds decisions:
– Roof geometry: pitch, squares, and complexity notes
– Photo log: overview, close-ups, and marked reference images
– Damage mapping: hail/wind patterns by elevation and roof plane
– Code and manufacturer references: compliance notes and best-practice recommendations
What you receive after the inspection
You’ll get a clear, written report with:
– A prioritized findings summary (safety/active leaks first)
– Photo documentation suitable for insurance files
– Repair, maintenance, or replacement recommendations
– Options that match your goals and budget, including:
– Targeted roof repairs
– Roof rejuvenation for aging asphalt shingles where appropriate
– Full replacement plans using premium systems (impact-resistant shingles; metal or tile; or, for low-slope, TPO/EPDM/Modified Bitumen or fluid-applied coatings)
– If storm-related: guidance on next steps for claims, including thorough documentation and advocacy support
Insurance and storm-damage guidance
Our team specializes in storm-damage evaluation and insurance advocacy. We document damage with the level of detail adjusters expect, help you understand policy language, and provide organized photo reports and scope notes. When replacement is recommended, we can specify resilient assemblies; as a Fortified Roofing Solutions certified contractor, we can propose upgrades designed to stand up to 130 mph winds, EF-2 tornadoes, and 2-inch hail.
How often should you schedule inspections?
- Twice per year: ideally spring (post-winter) and late summer/fall (after hail season)
- After any significant hail or wind event in your area
- When buying/selling a property or before a major renovation
Common Colorado findings we see
- Hail bruising that isn’t visible from the ground
- Wind-lifted shingles and creased tabs on south and west exposures
- Ice-dam staining near eaves caused by heat loss or blocked ventilation
- UV-driven shingle embrittlement at high elevations
- Clogged gutters causing fascia or soffit deterioration
Frequently asked questions
- Do I need to be home? Exterior-only inspections can proceed without you, but attic access or a detailed review is easier when you’re present.
- Will walking on the roof cause damage? Our trained inspectors follow manufacturer and safety guidelines and minimize foot traffic, especially on hot or brittle surfaces.
- Can you help if I’m filing a claim? Yes—our documentation and experience with storm restoration help streamline the process.
Why choose AC INC. Roofing
- Free inspections by HAAG-certified inspectors
- Master HAAG, Atlas Pro+ Platinum, and GAF Certified contractor
- Directorii-certified and backed by leading industry memberships (RSRA, CRA, NRCA, APA)
- Local, licensed, insured, and 5.0-star rated in the Denver metro area
Service area and contact
AC INC. Roofing is headquartered at 6145 Broadway, Suite 25, Denver, CO 80216. We serve homeowners and property managers across the Denver metro, Front Range, and Cheyenne, Wyoming.
Ready for a clear, no-pressure assessment of your roof’s condition? Contact Us today.